
Showing posts with label linux. Show all posts
Showing posts with label linux. Show all posts
Monday, December 28, 2020
Tuesday, December 15, 2015

Monday, December 14, 2015
Are Files Appends Really Atomic?
Nice post and thanks to the original author !
Ref: http://www.notthewizard.com/2014/06/17/are-files-appends-really-atomic/
#!/bin/bash
#############################################################################
#
# This script aims to test/prove that you can append to a single file from
# multiple processes with buffers up to a certain size, without causing one
# process' output to corrupt the other's.
#
# The script takes one parameter, the length of the buffer. It then creates
# 20 worker processes which each write 50 lines of the specified buffer
# size to the same file. When all processes are done outputting, it tests
# the output file to ensure it is in the correct format.
#
#############################################################################
NUM_WORKERS=20
LINES_PER_WORKER=50
OUTPUT_FILE=/tmp/out.tmp
# each worker will output $LINES_PER_WORKER lines to the output file
run_worker() {
worker_num=$1
buf_len=$2
# Each line will be a specific character, multiplied by the line length.
# The character changes based on the worker number.
filler_len=$((${buf_len}-1)) # -1 -> leave room for \n
filler_char=$(printf \\$(printf '%03o' $(($worker_num+64))))
line=`for i in $(seq 1 $filler_len);do echo -n $filler_char;done`
for i in $(seq 1 $LINES_PER_WORKER)
do
echo $line >> $OUTPUT_FILE
done
}
if [ "$1" = "worker" ]; then
run_worker $2 $3
exit
fi
buf_len=$1
if [ "$buf_len" = "" ]; then
echo "Buffer length not specified, defaulting to 4096"
buf_len=4096
fi
rm -f $OUTPUT_FILE
echo Launching $NUM_WORKERS worker processes
for i in $(seq 1 $NUM_WORKERS)
do
$0 worker $i $buf_len &
pids[$i]=${!}
done
echo Each line will be $buf_len characters long
echo Waiting for processes to exit
for i in $(seq 1 $NUM_WORKERS)
do
wait ${pids[$i]}
done
# Now we want to test the output file. Each line should be the same letter
# repeated buf_len-1 times (remember the \n takes up one byte). If we had
# workers writing over eachother's lines, then there will be mixed characters
# and/or longer/shorter lines.
echo Testing output file
# Make sure the file is the right size (ensures processes didn't write over
# eachother's lines)
expected_file_size=$(($NUM_WORKERS * $LINES_PER_WORKER * $buf_len))
actual_file_size=`cat $OUTPUT_FILE | wc -c`
if [ "$expected_file_size" -ne "$actual_file_size" ]; then
echo Expected file size of $expected_file_size, but got $actual_file_size
else
# File size is OK, test the actual content
# Only use newer versions of grep because older ones are way too slow with
# backreferences
[[ $(grep --version) =~ [^[:digit:]]*([[:digit:]]+)\.([[:digit:]]+) ]]
grep_ver="${BASH_REMATCH[1]}${BASH_REMATCH[2]}"
if [ "$grep_ver" -ge "216" ]; then
num_lines=$(grep -v "^\(.\)\1\{$((${buf_len}-2))\}$" $OUTPUT_FILE | wc -l)
else
# Scan line by line in bash, which isn't that speedy, but is good enough
# Note: Doesn't work on cygwin for lines < 255
line_length=$((${buf_len}-1))
num_lines=0
for line in `cat $OUTPUT_FILE`
do
if ! [[ $line =~ ^${line:0:1}{$line_length}$ ]]; then
num_lines=$(($num_lines+1))
fi;
echo -n .
done
echo
fi
if [ "$num_lines" -gt "0" ]; then
echo "Found $num_lines instances of corrupted lines"
else
echo "All's good! The output file had no corrupted lines. $size"
fi
fi
rm -f $OUTPUT_FILE
Friday, November 20, 2015

Monday, October 28, 2013

Friday, December 4, 2009
How to Profile Memory in Linux.
Disclaimer:
I found this great article on a Linux mailing list. It is written by Jake Dawley-Carr and I honestly do not know what the copyright is on it but since it was posted on a mailing list, I assume it is in public domain. If the author contacts me, I will remove it but meanwhile, I would like to republish it because there is no knowing how long the article is going to be indexed and it would be too bad it to get lost.
HOWTO: Profile Memory in a Linux System
1. Introduction
It's important to determine how your system utilizes it's
resources. If your systems performance is unacceptable, it is
necessary to determine which resource is slowing the system
down. This document attempts to identify the following:
a. What is the system memory usage per unit time?
b. How much swap is being used per unit time?
c. What does each process' memory use look like over time?
d. What processes are using the most memory?
I used a RedHat-7.3 machine (kernel-2.4.18) for my experiments,
but any modern Linux distribution with the commands "ps" and
"free" would work.
2. Definitions
RAM (Random Access Memory) - Location where programs reside when
they are running. Other names for this are system memory or
physical memory. The purpose of this document is to determine if
you have enough of this.
Memory Buffers - A page cache for the virtual memory system. The
kernel keeps track of frequently accessed memory and stores the
pages here.
Memory Cached - Any modern operating system will cache files
frequently accessed. You can see the effects of this with the
following commands:
for i in 1 2 ; do
free -o
time grep -r foo /usr/bin >/dev/null 2>/dev/null
done
Memory Used - Amount of RAM in use by the computer. The kernel
will attempt to use as much of this as possible through buffers
and caching.
Swap - It is possible to extend the memory space of the computer
by using the hard drive as memory. This is called swap. Hard
drives are typically several orders of magnitude slower than RAM
so swap is only used when no RAM is available.
Swap Used - Amount of swap space used by the computer.
PID (Process IDentifier) - Each process (or instance of a running
program) has a unique number. This number is called a PID.
PPID (Parent Process IDentifier) - A process (or running program)
can create new processes. The new process created is called a
child process. The original process is called the parent
process. The child process has a PPID equal to the PID of the
parent process. There are two exceptions to this rule. The first
is a program called "init". This process always has a PID of 1 and
a PPID of 0. The second exception is when a parent process exit
all of the child processes are adopted by the "init" process and
have a PPID of 1.
VSIZE (Virtual memory SIZE) - The amount of memory the process is
currently using. This includes the amount in RAM and the amount in
swap.
RSS (Resident Set Size) - The portion of a process that exists in
physical memory (RAM). The rest of the program exists in swap. If
the computer has not used swap, this number will be equal to
VSIZE.
3. What consumes System Memory?
The kernel - The kernel will consume a couple of MB of memory. The
memory that the kernel consumes can not be swapped out to
disk. This memory is not reported by commands such as "free" or
"ps".
Running programs - Programs that have been executed will consume
memory while they run.
Memory Buffers - The amount of memory used is managed by the
kernel. You can get the amount with "free".
Memory Cached - The amount of memory used is managed by the
kernel. You can get the amount with "free".
4. Determining System Memory Usage
The inputs to this section were obtained with the command:
free -o
The command "free" is a c program that reads the "/proc"
filesystem.
There are three elements that are useful when determining the
system memory usage. They are:
a. Memory Used
b. Memory Used - Memory Buffers - Memory Cached
c. Swap Used
A graph of "Memory Used" per unit time will show the "Memory Used"
asymptotically approach the total amount of memory in the system
under heavy use. This is normal, as RAM unused is RAM wasted.
A graph of "Memory Used - Memory Buffered - Memory Cached" per
unit time will give a good sense of the memory use of your
applications minus the effects of your operating system. As you
start new applications, this value should go up. As you quit
applications, this value should go down. If an application has a
severe memory leak, this line will have a positive slope.
A graph of "Swap Used" per unit time will display the swap
usage. When the system is low on RAM, a program called kswapd will
swap parts of process if they haven't been used for some time. If
the amount of swap continues to climb at a steady rate, you may
have a memory leak or you might need more RAM.
5. Per Process Memory Usage
The inputs to this section were obtained with the command:
ps -eo pid,ppid,rss,vsize,pcpu,pmem,cmd -ww --sort=pid
The command "ps" is a c program that reads the "/proc"
filesystem.
There are two elements that are useful when determining the per
process memory usage. They are:
a. RSS
b. VSIZE
A graph of RSS per unit time will show how much RAM the process is
using over time.
A graph of VSIZE per unit time will show how large the process is
over time.
6. Collecting Data
a. Reboot the system. This will reset your systems memory use
b. Run the following commands every ten seconds and redirect the
results to a file.
free -o
ps -eo pid,ppid,rss,vsize,pcpu,pmem,cmd -ww --sort=pid
c. Do whatever you normally do on your system
d. Stop logging your data
7. Generate a Graph
a. System Memory Use
For the output of "free", place the following on one graph
1. X-axis is "MB Used"
2. Y-axis is unit time
3. Memory Used per unit time
4. Memory Used - Memory Buffered - Memory Cached per unit time
5. Swap Used per unit time
b. Per Process Memory Use
For the output of "ps", place the following on one graph
1. X-axis is "MB Used"
2. Y-axis is unit time
3. For each process with %MEM > 10.0
a. RSS per unit time
b. VSIZE per unit time
8. Understand the Graphs
a. System Memory Use
"Memory Used" will approach "Memory Total"
If "Memory Used - Memory Buffered - Memory Cached" is 75% of
"Memory Used", you either have a memory leak or you need to
purchase more memory.
b. Per Process Memory Use
This graph will tell you what processes are hogging the
memory.
If the VSIZE of any of these programs has a constant, positive
slope, it may have a memory leak.
Reference : http://www.freshblurbs.com/how-profile-memory-linux
Tuesday, September 8, 2009
IE within Firefox ? Try IE Tab Today !
IE Tab allows users to view pages using the Internet Explorer rendering engine from within Firefox. This may be useful for viewing pages that only work in Internet Explorer (e.g. Windows Update) without exiting Firefox. Pages viewed through the IE Tab extension will be recorded in Internet Explorer's history, cache, and so on, as if they had been viewed directly in Internet Explorer. The extension has become popular among web developers, since they can display and compare their websites in the two browsers simultaneously.
Download and try it from here. (https://addons.mozilla.org/en-US/firefox/addon/1419)
Screenshots :


Reference : http://ietab.mozdev.org/
Download and try it from here. (https://addons.mozilla.org/en-US/firefox/addon/1419)
Screenshots :
Reference : http://ietab.mozdev.org/
Creating Tiny ELF Executables For Linux !
Recently got a nice article link from my friend.
Please continue reading from below :
Reference : http://www.muppetlabs.com/~breadbox/software/tiny/teensyps.html
If you're a programmer who's become fed up with software bloat, then may you find herein the perfect antidote.
This document explores methods for squeezing excess bytes out of simple programs. (Of course, the more practical purpose of this document is to describe a few of the inner workings of the ELF file format and the Linux operating system. But hopefully you can also learn something about how to make really teensy ELF executables in the process.)
Please note that the information and examples given here are, for the most part, specific to ELF executables on a Linux platform running under an Intel-386 architecture. I imagine that a good bit of the information is applicable to other ELF-based Unices, but my experiences with such are too limited for me to say with certainty.
Please also note that if you aren't a little bit familiar with assembly code, you may find parts of this document sort of hard to follow. (The assembly code that appears in this document is written using Nasm; see http://www.nasm.us/.)
In order to start, we need a program. Almost any program will do, but the simpler the program the better, since we're more interested in how small we can make the executable than what the program does.
Let's take an incredibly simple program, one that does nothing but return a number back to the operating system. Why not? After all, Unix already comes with no less than two such programs: true and false. Since 0 and 1 are already taken, we'll use the number 42.
So, here is our first version:
  /* tiny.c */
 int main(void) { return 42; }
which we can compile and test like so:
  $ gcc -Wall tiny.c
 $ ./a.out ; echo $?
 42
So. How big is it? Well, on my machine, I get:
  $ wc -c a.out
    3998 a.out
(Yours will probably differ some.) Admittedly, that's pretty small by today's standards, but it's almost certainly bigger than it needs to be.
The obvious first step is to strip the executable:
  $ gcc -Wall -s tiny.c
 $ ./a.out ; echo $?
 42
 $ wc -c a.out
    2632 a.out
That's certainly an improvement. For the next step, how about optimizing?
  $ gcc -Wall -s -O3 tiny.c
 $ wc -c a.out
    2616 a.out
That also helped, but only just. Which makes sense: there's hardly anything there to optimize.
It seems unlikely that there's much else we can do to shrink a one-statement C program. We're going to have to leave C behind, and use assembler instead. Hopefully, this will cut out all the extra overhead that C programs automatically incur.
So, on to our second version. All we need to do is return 42 from main(). In assembly language, this means that the function should set the accumulator, eax, to 42, and then return:
  ; tiny.asm
 BITS 32
 GLOBAL main
 SECTION .text
 main:
               mov     eax, 42
               ret
We can then build and test like so:
  $ nasm -f elf tiny.asm
 $ gcc -Wall -s tiny.o
 $ ./a.out ; echo $?
 42
(Hey, who says assembly code is difficult?) And now how big is it?
  $ wc -c a.out
    2604 a.out
Looks like we shaved off a measly twelve bytes. So much for all the extra overhead that C automatically incurs, eh?
..................Please continue reading from below :
Reference : http://www.muppetlabs.com/~breadbox/software/tiny/teensyps.html
Wednesday, July 22, 2009
Linux Podcasts !
Dont miss the podcasts about the latest news on linux... You can configure your favorite player to listen...
http://www.thelinuxlink.net/ gives the lists of linux podcasts .... Just check that out....
http://www.thelinuxlink.net/ gives the lists of linux podcasts .... Just check that out....
Thursday, June 11, 2009
POSIX Process Group !
If you want to kill a process by its pid with all its sub process and dont want the child process to continue under init process ? Then process group is the one you may want to look at.
p1->p2->p3
By using p1, if you want to kill entire p1,p2 and p3 then we can look into process group. Remember that linux kill command has a option to send signals to entire process group like this :
kill -s sig_num-pid
Also, if you want to start a process through a cgi script and detach it completely from httpd process this would be helpful.
A small program to showcase the use of POSIX setsid.
Further details on the process groups ...
if (getpgrp() != getpid()) { ioctl(tty, TIOCNOTTY, 0); setpgrp(getpid(), getpid()); }
p1->p2->p3
By using p1, if you want to kill entire p1,p2 and p3 then we can look into process group. Remember that linux kill command has a option to send signals to entire process group like this :
kill -s sig_num
Also, if you want to start a process through a cgi script and detach it completely from httpd process this would be helpful.
A small program to showcase the use of POSIX setsid.
use POSIX qw(setsid);

chdir '/'                 or die "Can't chdir to /: $!";
umask 0;
open STDIN, '/dev/null'   or die "Can't read /dev/null: $!";
#open STDOUT, '>/dev/null' or die "Can't write to /dev/null: $!";
open STDERR, '>/dev/null' or die "Can't write to /dev/null: $!";
defined(my $pid = fork)   or die "Can't fork: $!";
exit if $pid;
setsid                    or die "Can't start a new session: $!";

while(1) {
sleep(5);
print "Hello...\n";
}
Further details on the process groups ...
Process Groups and Tty Management
One of the areas least-understood by most UNIX programmers is process-group management, a topic that is inseparable from signal-handling.
To understand why process-groups exist, think back to the world before windowing systems.
Your average developer wants to run several programs simultaneously -- usually at least an editor and a compilation, although often a debugger as well. Obviously you cannot have two processes reading from the same tty at the same time -- they'll each get some of the characters you type, a useless situation. Likewise output should be managed so that your editor's output doesn't get the output of a background compile intermixed, destroying the screen.
This has been a problem with many operating systems. One solution, used by Tenex and TOPS-20, was to use process stacks. You could interrupt a process to run another process, and when the new process was finished the old would restart.
While this was useful it didn't allow you to switch back and forth between processes (like a debugger and editor) without exiting one of them. Clearly there must be a better way.
The Berkeley Approach
The Berkeley UNIX folks came up with a different idea, called process groups. Whenever the shell starts a new command each process in the command (there can be more than one, eg "ls | more") is placed in its own process group, which is identified by a number. The tty has a concept of "foreground process group", the group of processes which is allowed to do input and output to the tty. The shell sets the foreground process group when starting a new set of processes; by convention the new process group number is the same as the process ID of one of the members of the group. A set of processes has a tty device to which it belongs, called its "controlling tty". This tty device is what is returned when /dev/tty is opened.
Because you want to be able to interrupt the foreground processes, the tty watches for particular keypresses (^Z is the most common one) and sends an interrupt signal to the foreground process group when it sees one. All processes in the process group see the signal, and all stop -- returning control to the shell.
At this point the shell can place any of the active process groups back in the foreground and restart the processes, or start a new process group.
To handle the case where a background process tries to read or write from the tty, the tty driver will send a SIGTTIN or SIGTTOU signal to any background process which attempts to perform such an operation. Under normal circumstances, therefore, only the foreground process(es) can use the tty.
The set of commands to handle process groups is small and straightforward. Under BSD, the commands are:
int setpgrp(intprocess_id, intgroup_number);- Move a process into a process group. If you are creating a new process group the group_number should be the same as process_id. If process_id is zero, the current process is moved.
int getpgrp(intprocess_id);- Find the process group of the indicated process. If process_id is zero, the current process is inspected.
int killpgrp(intsignal_number, intgroup_number);- Send a signal to all members of the indicated process group.
int ioctl(inttty, TIOCSETPGRP, intforeground_group);- Change the foreground process group of a tty.
int ioctl(inttty, TIOCGETPGRP, int *foreground_group);- Find the foreground process group of a tty.
int ioctl(inttty, TIOCNOTTY, 0);- Disassociate this process from its controlling tty. The next tty device that is opened will become the new controlling tty.
The POSIX Approach
The BSD process-group API is rarely used today, although most of the concepts survive. The POSIX specification has provided new interfaces for handling process groups, and even overloaded some existing ones. It also limits several of the calls in ways which BSD did not.
The POSIX process-group API is:
int setpgid(intprocess_id, intprocess_group);- Move a process into a new process group. Process_id is the process to move, process_group is the new process group.
int getpgid(intprocess_id);- Find the process group of a process. Process_id is the process to inspect.
int getpgrp(void);- Find the process group of the current process. This is identical to
getpgrp(getpid()). int tcsetpgrp(inttty, intforeground_group);- Change the foreground process group of a tty. Tty is the file descriptor of the tty to change, foreground_group is the new foreground process group.
int tcgetpgrp(inttty, int *foreground_group);- Find the foreground process group of a tty. Tty is the file descriptor of the tty to inspect, foreground_group is returned filled with the foreground process group of the tty.
int kill(int -process_group, intsignal_number);- Send a signal to a process group. Note that process_group must be passed as a negative value, otherwise the signal goes to the indicated process.
Differences between POSIX and BSD Process Group Management
The setpgrp() function is called setpgid() under POSIX and is essentially identical. You must be careful under POSIX not to use the setpgrp() function -- usually it exists, but performs the operation of setsid().
The getpgrp() function was renamed getpgid(), and getpgid() can only inspect the current process' process group.
The killpgrp() function doesn't exist at all. Instead, a negative value passed to the kill() function is taken to mean the process group. Thus you'd perform killpgrp(process_group) by calling kill(-process_group).
The ioctl() commands for querying and changing the foreground process group are replaced with first-class functions:
int tcsetpgrp(inttty, intprocess_group);int tcgetpgrp(inttty, int *process_group);
While the original BSD ioctl() functions would allow any tty to take on any process group (or even nonexistant process groups) as its foreground tty, POSIX allows only process groups which have the tty as their controlling tty. This limitation disallows some ambiguous (and potentially security-undermining) cases present in BSD.
The TIOCNOTTY ioctl used in BSD is replaced with the setsid() function, which is essentially identical to:
It releases the current tty and puts the calling process into its own process group. Notice that nothing is done if the calling process is already in its own process group -- this is another new limitation, and eliminates some ambiguous cases that existed in BSD (along with some of BSD's flexibility).
Reference : http://www.cs.ucsb.edu/~almeroth/classes/W99.276/assignment1/signals.htmlVim - Cheatsheet
A cheat sheet of some useful and most often used Vim commands. This Vim cheat sheet isn't trying to include all the Vim commands in the known universe, but should list the most essential ones.
Author: Nana Långstedt <>
tuXfile created: 18 January 2003
Last modified: 22 September 2005
< The list of Vim commands >
| Working with files | |
| Vim command | Action |
| :e filename | Open a new file. You can use the Tab key for automatic file name completion, just like at the shell command prompt. |
| :w filename | Save changes to a file. If you don't specify a file name, Vim saves as the file name you were editing. For saving the file under a different name, specify the file name. |
| :q | Quit Vim. If you have unsaved changes, Vim refuses to exit. |
| :q! | Exit Vim without saving changes. |
| :wq | Write the file and exit. |
| :x | Almost the same as :wq, write the file and exit if you've made changes to the file. If you haven't made any changes to the file, Vim exits without writing the file. |
| Moving in the file | |
| These Vim commands and keys work both in command mode and visual mode. | |
| Vim command | Action |
| j or Up Arrow | Move the cursor up one line. |
| k or Down Arrow | Down one line. |
| l or Right Arrow | Right one character. |
| h or Left Arrow | Left one character. |
| e | To the end of a word. |
| E | To the end of a whitespace-delimited word. |
| b | To the beginning of a word. |
| B | To the beginning of a whitespace-delimited word. |
| 0 | To the beginning of a line. |
| ^ | To the first non-whitespace character of a line. |
| $ | To the end of a line. |
| H | To the first line of the screen. |
| M | To the middle line of the screen. |
| L | To the the last line of the screen. |
| :n | Jump to line number n. For example, to jump to line 42, you'd type :42 |
| Inserting and overwriting text | |
| Vim command | Action |
| i | Insert before cursor. |
| I | Insert to the start of the current line. |
| a | Append after cursor. |
| A | Append to the end of the current line. |
| o | Open a new line below and insert. |
| O | Open a new line above and insert. |
| C | Change the rest of the current line. |
| r | Overwrite one character. After overwriting the single character, go back to command mode. |
| R | Enter insert mode but replace characters rather than inserting. |
| The ESC key | Exit insert/overwrite mode and go back to command mode. |
| Deleting text | |
| Vim command | Action |
| x | Delete characters under the cursor. |
| X | Delete characters before the cursor. |
| dd or :d | Delete the current line. |
| Entering visual mode | |
| Vim command | Action |
| v | Start highlighting characters. Use the normal movement keys and commands to select text for highlighting. |
| V | Start highlighting lines. |
| The ESC key | Exit visual mode and return to command mode. |
| Editing blocks of text | |
| The Vim commands marked with (V) work in visual mode, when you've selected some text. The other commands work in the command mode, when you haven't selected any text. | |
| Vim command | Action |
| ~ | Change the case of characters. This works both in visual and command mode. In visual mode, change the case of highlighted characters. In command mode, change the case of the character uder cursor. |
| > (V) | Shift right. |
| < (V) | Shift left. |
| c (V) | Change the highlighted text. |
| y (V) | Yank the highlighted text. In Winblows terms, "copy the selected text to clipboard." |
| d (V) | Delete the highlighted text. In Winblows terms, "cut the selected text to clipboard." |
| yy or :y or Y | Yank the current line. You don't need to highlight it first. |
| dd or :d | Delete the current line. Again, you don't need to highlight it first. |
| p | In Winblows terms, "paste" the contents of the "clipboard". In Vim terms, you "put" the text you yanked or deleted. Put characters after the cursor. Put lines below the current line. |
| P | Put characters before the cursor. Put lines above the current line. |
| Undo and redo | |
| Vim command | Action |
| u | Undo the last action. |
| U | Undo all the latest changes that were made to the current line. |
| Ctrl + r | Redo. |
| Search | |
| Vim command | Action |
| /pattern | Search the file for pattern. |
| n | Scan for next search match in the same direction. |
| N | Scan for next search match but opposite direction. |
| Replace | |
| Vim command | Action |
| :rs/foo/bar/a | Substitute foo with bar. r determines the range and a determines the arguments. |
| The range (r) can be | |
| nothing | Work on current line only. |
| number | Work on the line whose number you give. |
| % | The whole file. |
| Arguments (a) can be | |
| g | Replace all occurrences in the line. Without this, Vim replaces only the first occurrences in each line. |
| i | Ignore case for the search pattern. |
| I | Don't ignore case. |
| c | Confirm each substitution. You can type y to substitute this match, n to skip this match, a to substitute this and all the remaining matches ("Yes to all"), and q to quit substitution. |
| Examples | |
| :452s/foo/bar/ | Replace the first occurrence of the word foo with bar on line number 452. |
| :s/foo/bar/g | Replace every occurrence of the word foo with bar on current line. |
| :%s/foo/bar/g | Replace every occurrence of the word foo with bar in the whole file. |
| :%s/foo/bar/gi | The same as above, but ignore the case of the pattern you want to substitute. This replaces foo, FOO, Foo, and so on. |
| :%s/foo/bar/gc | Confirm every substitution. |
| :%s/foo/bar/c | For each line on the file, replace the first occurrence of foo with bar and confirm every substitution. |
Play Windows Games on Linux - Try Cedega Today !
So, you are 1 out of many people who use windows just for gaming ??? If so, you can try this cedega tool and check whether your favourite game works on linux ! There are a few options when it comes to playing Windows games on Linux. Cedega is a great tool to allow you to play these games under Linux.
You can check whether your favourite game is supported by cedega here. (http://www.cedega.com/gamesdb/)
Remember that latest versions of cedega is not free. You may need to subscribe it here http://www.cedega.com/subscription/subscribe.html
But, older stable version can be downloaded from their cvs and compiled :)
Compilation Instructions : http://www.linux-gamers.net/modules/wiwimod/index.php?page=HOWTO+Cedega+CVS
Help Script : http://winecvs.linux-gamers.net/index.php/Main_Page
If you are scared about compiling by yourself, dont worry ! Your favourite linux distribution (Ubuntu, Suse, Fedora ...) might have already packaged it for you. Just check in their repositories :)
Wednesday, May 27, 2009
Linux Signals for the Application Programmer
Introduction about the usage of signals in Linux ...
A good understanding of signals is important for an application programmer working in the Linux environment. Knowledge of the signaling mechanism and familiarity with signal-related functions help one write programs more efficiently.
An application program executes sequentially if every instruction runs properly. In case of an error or any anomaly during the execution of a program, the kernel can use signals to notify the process. Signals also have been used to communicate and synchronize processes and to simplify interprocess communications (IPCs). Although we now have advanced synchronization tools and many IPC mechanisms, signals play a vital role in Linux for handling exceptions and interrupts. Signals have been used for approximately 30 years without any major modifications.
The first 31 signals are standard signals, some of which date back to 1970s UNIX from Bell Labs. The POSIX (Portable Operating Systems and Interface for UNIX) standard introduced a new class of signals designated as real-time signals, with numbers ranging from 32 to 63.
A signal is generated when an event occurs, and then the kernel passes the event to a receiving process. Sometimes a process can send a signal to other processes. Besides process-to-process signaling, there are many situations when the kernel originates a signal, such as when file size exceeds limits, when an I/O device is ready, when encountering an illegal instruction or when the user sends a terminal interrupt like Ctrl-C or Ctrl-Z.
Every signal has a name starting with SIG and is defined as a positive unique integer number. In a shell prompt, the kill -l command will display all signals with signal number and corresponding signal name. Signal numbers are defined in the /usr/include/bits/signum.h file, and the source file is /usr/src/linux/kernel/signal.c.
A process will receive a signal when it is running in user mode. If the receiving process is running in kernel mode, the execution of the signal will start only after the process returns to user mode.
Signals sent to a non-running process must be saved by the kernel until the process resumes execution. Sleeping processes can be interruptible or uninterruptible. If a process receives a signal when it is in an interruptible sleep state, for example, waiting for terminal I/O, the kernel will awaken the process to handle the signal. If a process receives a signal when it is in uninterruptible sleep, such as waiting for disk I/O, the kernel defers the signal until the event completes.
When a process receives a signal, one of three things could happen. First, the process could ignore the signal. Second, it could catch the signal and execute a special function called a signal handler. Third, it could execute the default action for that signal; for example, the default action for signal 15, SIGTERM, is to terminate the process. Some signals cannot be ignored, and others do not have default actions, so they are ignored by default. See the signal(7) man page for a reference list of signal names, numbers, default actions and whether they can be caught.
When a process executes a signal handler, if some other signal arrives the new signal is blocked until the handler returns. This article explains the fundamentals of the signaling mechanism and elaborates on signal-related functions with syntax and working procedures.
Where is the information about a signal stored in the process? The kernel has a fixed-size array of proc structures called the process table. The u or user area of the proc structure maintains control information about a process. The major fields in the u area include signal handlers and related information. The signal handler is an array with each element for each type of signal being defined in the system, indicating the action of the process on the receipt of the signal. The proc structure maintains signal-handling information, such as masks of signals that are ignored, blocked, posted and handled.
Once a signal is generated, the kernel sets a bit in the signal field of the process table entry. If the signal is being ignored, the kernel returns without taking any action. Because the signal field is one bit per signal, multiple occurrences of the same signal are not maintained.
When the signal is delivered, the receiving process should act depending on the signal. The action may be terminating the process, terminating the process after creating a core dump, ignoring the signal, executing the user-defined signal handler (if the signal is caught by the process) or resuming the process if it is temporarily suspended.
The core dump is a file called core, which has an image of the terminated process. It contains the process' variables and stack details at the time of failure. From a core file, the programmer can investigate the reason for termination using a debugger. The word core appears here for a historical reason: main memory used to be made from doughnut-shaped magnets called inductor cores.
Catching a signal means instructing the kernel that if a given signal has occurred, the program's own signal handler should be executed, instead of the default. Two exceptions are SIGKILL and SIGSTOP, which cannot be caught or ignored.
sigset_t is a basic data structure used to store the signals. The structure sent to a process is a sigset_t array of bits, one for each signal type:
typedef struct {
                  unsigned long sig[2];
               }  sigset_t;
Because each unsigned long number consists of 32 bits, the maximum number of signals that may be declared in Linux is 64 (according to POSIX compliance). No signal has the number 0, so the other 31 bits in the first element of sigset_t are the standard first 31 signals, and the bits in the second element are the real-time signal numbers 32-64. The size of sigset_t is 128 bytes.
Reference : http://m.linuxjournal.com/article/6483
Friday, May 22, 2009
Managing Tasks on x86 Processors !
Just came across an article about tasks in x86 ...
Intel's x86 microprocessors can automatically manage tasks just like a simple operating system. There are many tricks and pitfalls, however, but with the right approach the programmer can get great performance at zero cost.
Just about every embedded system does some sort of task switching or task management. You don't always have to use a full-size operating system or RTOS to do task management; sometimes a little kernel executive is enough or even a quick time-slice interrupt. In the extreme case, you don't need any software at all: the processor can manage tasks for you. In this article, we'll drill into the x86 task-management features.
Hardware task-management started with the '386 and continues to this day on chips like the old '486 and Pentium as well as the newer Athlon, Opteron, and Pentium 4 processors. It's a terrific feature for embedded systems programmers because it makes task management fairly simple and foolproof. Whether you're managing just two tasks or dozens, you can probably let the chip do it all for you—for free.


Sunday, May 10, 2009
Anatomy of a Program in Memory
Just found it interesting about linux memory management ...
Please continue reading from the reference site ...
Reference : http://duartes.org/gustavo/blog/post/anatomy-of-a-program-in-memory
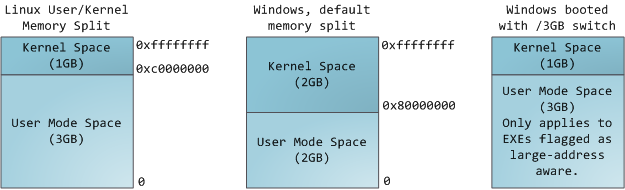
Memory management is the heart of operating systems; it is crucial for both programming and system administration. In the next few posts I’ll cover memory with an eye towards practical aspects, but without shying away from internals. While the concepts are generic, examples are mostly from Linux and Windows on 32-bit x86. This first post describes how programs are laid out in memory.
Each process in a multi-tasking OS runs in its own memory sandbox. This sandbox is the virtual address space, which in 32-bit mode is always a 4GB block of memory addresses. These virtual addresses are mapped to physical memory by page tables, which are maintained by the operating system kernel and consulted by the processor. Each process has its own set of page tables, but there is a catch. Once virtual addresses are enabled, they apply to all software running in the machine, including the kernel itself. Thus a portion of the virtual address space must be reserved to the kernel:
Please continue reading from the reference site ...
Reference : http://duartes.org/gustavo/blog/post/anatomy-of-a-program-in-memory
Sunday, April 26, 2009
Hello, world! - Assembly in Linux
One program which I like most. This would be my first program in any language which Im learning. Because, this helps me to setup that programming environment and also which gives me a lot of confidence :)
Of course, credits goes to the author.
 ## hello-world.s

 ## by Robin Miyagi
 ## http://www.geocities.com/SiliconValley/Ridge/2544/

 ## Compile Instructions:
 ## -------------------------------------------------------------
 ## as -o hello-world.o hello-world.s
 ## ld -o hello-world -O0 hello-world.o

 ## This  file is  a basic  demonstration of  the  GNU assembler,
 ## `as'.

 ## This program  displays a friendly string on  the screen using
 ## the write () system call
########################################################################
 .section .data
hello:
 .ascii  "Hello, world!\n"
hello_len:
 .long  . - hello
########################################################################
 .section .text
 .globl _start

_start:
 ## display string using write () system call
 xorl %ebx, %ebx  # %ebx = 0
 movl $4, %eax  # write () system call
 xorl %ebx, %ebx  # %ebx = 0
 incl %ebx  # %ebx = 1, fd = stdout
 leal hello, %ecx # %ecx ---> hello
 movl hello_len, %edx # %edx = count
 int $0x80  # execute write () system call

 ## terminate program via _exit () system call
 xorl %eax, %eax  # %eax = 0
 incl %eax  # %eax = 1 system call _exit ()
 xorl %ebx, %ebx  # %ebx = 0 normal program return code
 int $0x80  # execute system call _exit ()
Of course, credits goes to the author.
Assembly Language ...
I have last worked on assembly in my college days ... So while in the processing of understanding kernel 0.01, these are some of the links which im using ...
scr.csc.noctrl.edu/courses/csc220/asm/gasmanual.pdf
student.ulb.ac.be/~dboigelo/info-f-102/files/i386.pdf
http://www.cs.utah.edu/dept/old/texinfo/as/as_toc.html
And ofcourse, my favourite
pramode.net/kerneldocs/kc.ps.gz
scr.csc.noctrl.edu/courses/csc220/asm/gasmanual.pdf
student.ulb.ac.be/~dboigelo/info-f-102/files/i386.pdf
http://www.cs.utah.edu/dept/old/texinfo/as/as_toc.html
And ofcourse, my favourite
pramode.net/kerneldocs/kc.ps.gz
Saturday, April 25, 2009
About First Linux Announcement and Linus !


From: Linus Benedict Torvalds [email blocked]
Newsgroups: comp.os.minix
Subject: What would you like to see most in minix?
Date: 25 Aug 91 20:57:08 GMT

Hello everybody out there using minix -

I'm doing a (free) operating system (just a hobby, won't be big and
professional like gnu) for 386(486) AT clones.  This has been brewing
since april, and is starting to get ready.  I'd like any feedback on
things people like/dislike in minix, as my OS resembles it somewhat
(same physical layout of the file-system (due to practical reasons)
among other things).

I've currently ported bash(1.08) and gcc(1.40), and things seem to work.
This implies that I'll get something practical within a few months, and
I'd like to know what features most people would want.  Any suggestions
are welcome, but I won't promise I'll implement them :-)

               Linus (torva... at kruuna.helsinki.fi)

PS.  Yes - it's free of any minix code, and it has a multi-threaded fs.
It is NOT protable (uses 386 task switching etc), and it probably never
will support anything other than AT-harddisks, as that's all I have :-(.
Rererence : http://kerneltrap.org/node/14002
Linux Kernel 0.01 - Try in Qemu !
Interesting ... Dont miss it ...
From: Abdel
Subject: linux 0.01 released
Date: Jan 1, 4:56 pm 2008

Hello everybody and happy new year,


I have ported linux 0.01 to gcc-4.x, and bach-3.2 (and few others
programs) can run on it.

so you will find binary Image of linux 0.01 floppy and qemu hdd here:
http://draconux.free.fr/download/os-dev/linux0.01/Image/

to run it on qemu :
> qemu  -hdb hd_oldlinux.img  -fda linux-0.01-3.3.omg -boot a
nb : also work with bochs, and I have not tested it (yet) on real computer.

----------------

kernel source code :
http://draconux.free.fr/download/os-dev/linux0.01/linux-0.01-rm-3.x/linux-0.01-rm-3.3....

to see change from original linux 0.01 to linux-0.01-3.3 see
- http://draconux.free.fr/download/os-dev/linux0.01/doc/note_patch
- http://draconux.free.fr/download/os-dev/linux0.01/linux-0.01-rm-1.x/patch_*
- http://draconux.free.fr/download/os-dev/linux0.01/linux-0.01-rm-3.x/patch_*
- http://draconux.free.fr/download/os-dev/linux0.01/linux-0.01-rm-2.x/patch_*

doc :
http://draconux.free.fr/download/os-dev/linux0.01/doc/LINUX_0.01_GCC_4.x

----------------

If you have some problem runing linux 0.01 you can mail me :)

regards,

--
Abdel Benamrouche
http://draconux.free.fr/
--

Reference : http://kerneltrap.org/Linux/Dusting_Off_the_0.01_Kernel
Tuesday, April 21, 2009
Emacs - Cheatsheet
Useful one ...
.---------------------------------------------------------------------------.
| |
| Readline Emacs Editing Mode |
| Default Keyboard Shortcut |
| Cheat Sheet |
| |
'---------------------------------------------------------------------------'
| Peteris Krumins (peter@catonmat.net), 2007.10.30 |
| http://www.catonmat.net - good coders code, great reuse |
| |
| Released under the GNU Free Document License |
'---------------------------------------------------------------------------'
======================== Keyboard Shortcut Summary ========================
.--------------.-------------------.----------------------------------------.
| | | |
| Shortcut | Function | Description |
| | | |
'--------------'-------------------'----------------------------------------'
| Commands for Moving: |
'--------------.-------------------.----------------------------------------'
| C-a | beginning-of-line | Move to the beginning of line. |
'--------------+-------------------+----------------------------------------'
| C-e | end-of-line | Move to the end of line. |
'--------------+-------------------+----------------------------------------'
| C-f | forward-char | Move forward a character. |
'--------------+-------------------+----------------------------------------'
| C-b | backward-char | Move back a character. |
'--------------+-------------------+----------------------------------------'
| M-f | forward-word | Move forward a word. |
'--------------+-------------------+----------------------------------------'
| M-b | backward-word | Move backward a word. |
'--------------+-------------------+----------------------------------------'
| C-l | clear-screen | Clear the screen leaving the current |
| | | line at the top of the screen. |
'--------------+-------------------+----------------------------------------'
| (unbound) | redraw-current- | Refresh the current line. |
| | line | |
'--------------'-------------------'----------------------------------------'
| Commands for Changing Text: |
'--------------.-------------------.----------------------------------------'
| C-d | delete-char | Delete one character at point. |
'--------------+-------------------+----------------------------------------'
| Rubout | backward-delete- | Delete one character backward. |
| | char | |
'--------------+-------------------+----------------------------------------'
| C-q or C-v | quoted-insert | Quoted insert. |
'--------------+-------------------+----------------------------------------'
| M-TAB or | tab-insert | Insert a tab character. |
| M-C-i | | |
'--------------+-------------------+----------------------------------------'
| a, b, A, 1, | self-insert | Insert the character typed. |
| ... | | |
'--------------+-------------------+----------------------------------------'
| C-t | transpose-chars | Exchange the char before cursor with |
| | | the character at cursor. |
'--------------+-------------------+----------------------------------------'
| M-t | transpose-words | Exchange the word before cursor with |
| | | the word at cursor. |
'--------------+-------------------+----------------------------------------'
| M-u | upcase-word | Uppercase the current word. |
'--------------+-------------------+----------------------------------------'
| M-l | downcase-word | Lowercase the current word. |
'--------------+-------------------+----------------------------------------'
| M-c | capitalize-word | Capitalize the current word. |
'--------------+-------------------+----------------------------------------'
| (unbound) | overwrite-mode | Toggle overwrite mode. |
'--------------'-------------------'----------------------------------------'
| Killing and Yanking: |
'--------------.-------------------.----------------------------------------'
| C-k | kill-line | Kill the text from point to the end of |
| | | the line. |
'--------------+-------------------+----------------------------------------'
| C-x Rubout | backward-kill | Kill backward to the beginning of the |
| | -line | line. |
'--------------+-------------------+----------------------------------------'
| C-u | unix-line-discard | Kill backward from point to the |
| | | beginning of the line. |
'--------------+-------------------+----------------------------------------'
| M-d | kill-word | Kill from point to the end of the |
| | | current word. |
'--------------+-------------------+----------------------------------------'
| M-Rubout | backward-kill-word| Kill the word behind point. |
'--------------+-------------------+----------------------------------------'
| C-w | unix-word-rubout | Kill the word behind point, using |
| | | white space as a word boundary. |
'--------------+-------------------+----------------------------------------'
| M-\ | delete- | Delete all spaces and tabs around |
| | horizontal-space | point. |
'--------------+-------------------+----------------------------------------'
| C-y | yank | Yank the top of the kill ring into the |
| | | buffer at point. |
'--------------+-------------------+----------------------------------------'
| M-y | yank-pop | Rotate the kill ring, and yank the new |
| | | top |
'--------------+-------------------+----------------------------------------'
| (unbound) | kill-whole-line | Kill all characters on the current |
| | | line |
'--------------+-------------------+----------------------------------------'
| (unbound) | kill-region | Kill the text between the point and |
| | | mark. |
'--------------+-------------------+----------------------------------------'
| (unbound) | copy-region-as- | Copy the text in the region to the |
| | kill | kill buffer. |
'--------------+-------------------+----------------------------------------'
| (unbound) | copy-backward- | Copy the word before point to the kill |
| | word | buffer. |
'--------------+-------------------+----------------------------------------'
| (unbound) | copy-forward-word | Copy the word following point to the |
| | | kill buffer. |
'--------------'-------------------'----------------------------------------'
| Keyboard Macros: |
'--------------.-------------------.----------------------------------------'
| C-x ( | start-kbd-macro | Begin saving the chars typed into the |
| | | current keyboard macro. |
'--------------+-------------------+----------------------------------------'
| C-x ) | end-kbd-macro | End saving the chars typed into the |
| | | current keyboard macro. |
'--------------+-------------------+----------------------------------------'
| C-x e | call-last-kbd- | Re-execute the last keyboard macro |
| | macro | defined. |
'--------------'-------------------'----------------------------------------'
| Commands for Manipulating the History: |
'--------------.-------------------.----------------------------------------'
| Return | accept-line | Accept the line regardless of where |
| | | the cursor is. |
'--------------+-------------------+----------------------------------------'
| C-p | previous-history | Fetch the previous command from the |
| | | history list. |
'--------------+-------------------+----------------------------------------'
| C-n | next-history | Fetch the next command from the |
| | | history list. |
'--------------+-------------------+----------------------------------------'
| M-< | beginning-of- | Move to the first line in the history. |
| | history | |
'--------------+-------------------+----------------------------------------'
| M-> | end-of-history | Move to the end of the input history |
'--------------+-------------------+----------------------------------------'
| C-r | reverse-search- | Search backward starting at the |
| | history | current line (incremental). |
'--------------+-------------------+----------------------------------------'
| C-s | forward-search- | Search forward starting at the current |
| | history | line (incremental). |
'--------------+-------------------+----------------------------------------'
| M-p | non-incremental- | Search backward using non-incremental |
| | reverse-search- | search. |
| | history | |
'--------------+-------------------+----------------------------------------'
| M-n | non-incremental- | Search forward using non-incremental |
| | forward-search- | search. |
| | history | |
'--------------+-------------------+----------------------------------------'
| M-C-y | yank-nth-arg | Insert the n-th argument to the |
| | | previous command at point. |
'--------------+-------------------+----------------------------------------'
| M-. M-_ | yank-last-arg | Insert the last argument to the |
| | | previous command. |
'--------------+-------------------+----------------------------------------'
| (unbound) | history-search- | Search forward for a string between |
| | backward | start of line and point. |
'--------------+-------------------+----------------------------------------'
| (unbound) | history-search- | Search backward for a string between |
| | forward | start of line and point. |
'--------------'-------------------'----------------------------------------'
| Completing: |
'--------------.-------------------.----------------------------------------'
| TAB | complete | Attempt to perform completion on the |
| | | text before point. |
'--------------+-------------------+----------------------------------------'
| M-? | possible- | List the possible completions of the |
| | completions | text before point. |
'--------------+-------------------+----------------------------------------'
| M-* | insert- | Insert all completions of the text |
| | completions | before point generated by |
| | | possible-completions. |
'--------------+-------------------+----------------------------------------'
| (unbound) | menu-complete | Similar to complete but replaces the |
| | | word with the first match. |
'--------------+-------------------+----------------------------------------'
| (unbound) | delete-char-or- | Deletes the car if not at the |
| | list | beginning of line or acts like |
| | | possible-completions at the end of |
| | | the line. |
'--------------'-------------------'----------------------------------------'
| Miscellaneous: |
'--------------.-------------------.----------------------------------------'
| C-x C-r | re-read-init-file | Read and execute the contents of |
| | | inputrc file. |
'--------------+-------------------+----------------------------------------'
| C-g | abort | Abort the current editing command and |
| | | ring the terminal's bell. |
'--------------+-------------------+----------------------------------------'
| M-a, M-b, | do-uppercase- | If the metafield char 'x' is lowercase |
| M-x, ... | version | run the command that is bound to |
| | | uppercase char. |
'--------------+-------------------+----------------------------------------'
| ESC | prefix-meta | Metafy the next character typed. |
| | | For example, ESC-p is equivalent to |
| | | Meta-p |
'--------------+-------------------+----------------------------------------'
| C-_ or | undo | Incremental undo, separately |
| C-x C-u | | remembered for each line. |
'--------------+-------------------+----------------------------------------'
| M-r | revert-line | Undo all changes made to this line. |
'--------------+-------------------+----------------------------------------'
| M-& | tilde-expand | Perform tilde expansion on the current |
| | | word. |
'--------------+-------------------+----------------------------------------'
| C-@ or | set-mark | Set the mark to the point. |
| M-| | |
'--------------+-------------------+----------------------------------------'
| C-x C-x | exchange-point- | Swap the point with the mark. |
| | and-mark | |
'--------------+-------------------+----------------------------------------'
| C-] | character-search | Move to the next occurance of current |
| | | character under cursor. |
'--------------+-------------------+----------------------------------------'
| M-C-] | character-search- | Move to the previous occurrence of |
| | backward | current character under cursor. |
'--------------+-------------------+----------------------------------------'
| M-# | insert-comment | Without argument line is commented, |
| | | with argument uncommented (if it was |
| | | commented). |
'--------------+-------------------+----------------------------------------'
| C-e | emacs-editing- | When in vi mode, switch to emacs mode. |
| | mode | |
'--------------+-------------------+----------------------------------------'
| M-C-j | vi-editing-mode | When in emacs mode, switch to vi mode. |
'--------------+-------------------+----------------------------------------'
| M-0, M-1, | digit-argument | Specify the digit to the argument. |
| ..., M-- | | M-- starts a negative argument. |
'--------------+-------------------+----------------------------------------'
| (unbound) | dump-functions | Print all of the functions and their |
| | | key bindings. |
'--------------+-------------------+----------------------------------------'
| (unbound) | dump-variables | Print all of the settable variables |
| | | and their values. |
'--------------+-------------------+----------------------------------------'
| (unbound) | dump-macros | Print all of the key sequences bound |
| | | to macros. |
'--------------+-------------------+----------------------------------------'
| (unbound) | universal- | Either sets argument or multiplies the |
| | argument | current argument by 4. |
'--------------'-------------------'----------------------------------------'
===========================================================================
.---------------------------------------------------------------------------.
| Peteris Krumins (peter@catonmat.net), 2007.10.30 |
| http://www.catonmat.net - good coders code, great reuse |
| |
| Released under the GNU Free Document License |
'---------------------------------------------------------------------------'
You can also download it from here as pdf.
Reference : http://www.cheat-sheets.org/#Emacs
Subscribe to:
Posts (Atom)

